Fairing on Azure
This page documents how to run the Fairing prediction example notebook on Azure Kubernetes Service (AKS) in a notebook hosted on Kubeflow.
Prerequisites
Before you configure and use the Kubeflow Fairing Python SDK, you must have a Kubeflow environment installed. The example notebook does in-cluster training. The example notebook has been tested to work in a cluster with 2 nodes and virtual machines with Standard_D4_v3 size. It is not recommended to use the smallest size virtual machines.
- If you do not have a Kubeflow installation on Azure, follow the installation guide.
- You must have the
kubectlcommand line interface installed and configured to use the Kubernetes cluster where Kubeflow is installed. In the above installation guide, the commandaz aks get-credentialsconfigureskubectlto access your Kubernetes cluster.
Create Azure Container Registry and Storage
The example notebook uses Azure Container Registry (ACR) to host docker images for deployment and Azure Storage (Storage) is used as build context for in-cluster building.
You can re-use existing ACR and Storage resources or create new ones. For more information, see the documentation for ACR and Storage.
After you have created your ACR and Storage resources, you must configure a service principal with access to these resources.
You can create a new service principal with the following command:
az ad sp create-for-rbac --name <name>
The above command has output like this:
{
  "appId": "<client-id>",
  "displayName": "<name>",
  "name": "http://<name>",
  "password": "<client-secret>",
  "tenant": "<tenant-id>"
}
The role you grant must have at least read and write permissions to ACR and
Storage. We recommend using the AcrPush role and the Storage Account Contributor role scoped to a resource group.
You can perform the role assignment for ACR like this:
az role assignment create --assignee <id> \
  --scope /subscriptions/<azure-subscription-id>/resourceGroups/<resource-group-name>/providers/Microsoft.ContainerRegistry/registries/<acr-name> \
  --role "AcrPush"
You can grant full storage rights at a resource group level like this:
az role assignment create --assignee <id> \
  --scope /subscriptions/<azure-subscription-id>/resourceGroups/<resource-group-name> \
  --role "Storage Account Contributor"
To learn more about how to grant the service principal access, follow the Azure role-based authentication documentation.
Setting up credentials as Kubernetes secrets
Before running the notebook, you must first configure credentials so that the Python code running within the cluster can access the Azure resources required to train and deploy a model.
Run the following commands to set up your credentials as a Kubernetes secret.
-
Set environment variables to use in the following commands.
export AZ_CLIENT_ID=<service-principal-client-id> export AZ_CLIENT_SECRET=<service-principal-client-secret> export AZ_TENANT_ID=<tenant-id> export AZ_SUBSCRIPTION_ID=<subscription-id> export TARGET_NAMESPACE=<target-namespace e.g. kubeflow-anonymous> export ACR_NAME=<acr-name>- AZ_CLIENT_ID: The service principal client ID. You can get the
client_idproperty from ~/.azure/aksServicePrincipal.json. - AZ_CLIENT_SECRET: The service principal secret.
- AZ_TENANT_ID: The Azure Tenant ID of your account. You can get the
Tenant ID from the
tenantIdfield in the output ofaz account show. - AZ_SUBSCRIPTION: The Azure Subscription ID of your account. You can
get the Subscription ID from the
idfield in the output ofaz account show. - TARGET_NAMESPACE: Specify the namespace that your Notebook Server is
in. For example, this guide recommends using
kubeflow-anonymous. - ACR_NAME: The name of an ACR that the service principal can access.
- AZ_CLIENT_ID: The service principal client ID. You can get the
-
Use the following command to create a secret that Kubeflow can use to access Azure APIs.
kubectl create secret generic -n ${TARGET_NAMESPACE} azcreds \ --from-literal=AZ_CLIENT_ID=${AZ_CLIENT_ID} \ --from-literal=AZ_CLIENT_SECRET=${AZ_CLIENT_SECRET} \ --from-literal=AZ_TENANT_ID=${AZ_TENANT_ID} \ --from-literal=AZ_SUBSCRIPTION_ID=${AZ_SUBSCRIPTION_ID} -
Use the following command to create a secret that Kubeflow can use to access ACR.
kubectl create secret docker-registry -n ${TARGET_NAMESPACE} acrcreds \
--docker-server=${ACR_NAME}.azurecr.io \
--docker-username=${AZ_CLIENT_ID} \
--docker-password=${AZ_CLIENT_SECRET}
kubectl patch serviceaccount default-editor -n ${TARGET_NAMESPACE} \
-p "{\"imagePullSecrets\": [{\"name\": \"acrcreds\"}]}"
Creating a Notebook Server in Kubeflow
To create a notebook server, use your Web browser to access the Kubeflow Central Dashboard and select the Notebook Servers panel from the menu.
First, select the target namespace in which you want to host the server. In the
default Kubeflow installation, there should be a namespace kubeflow-anonymous
available in the namespace drop-down menu.
After the target namespace is selected, click NEW SERVER and fill in the mandatory fields. The fields with default values can all be left as they are and do not have to be modified to run the example notebook.
After launching the server, wait for the CONNECT button to appear and click CONNECT to launch your Notebook Server. It may take up to a minute for the server to be ready for connections.
Cloning the example notebook
Clone the Kubeflow Fairing repository to download the files used in this example.
-
Connect to your notebook server, then click the new terminal option like in the screenshot below:
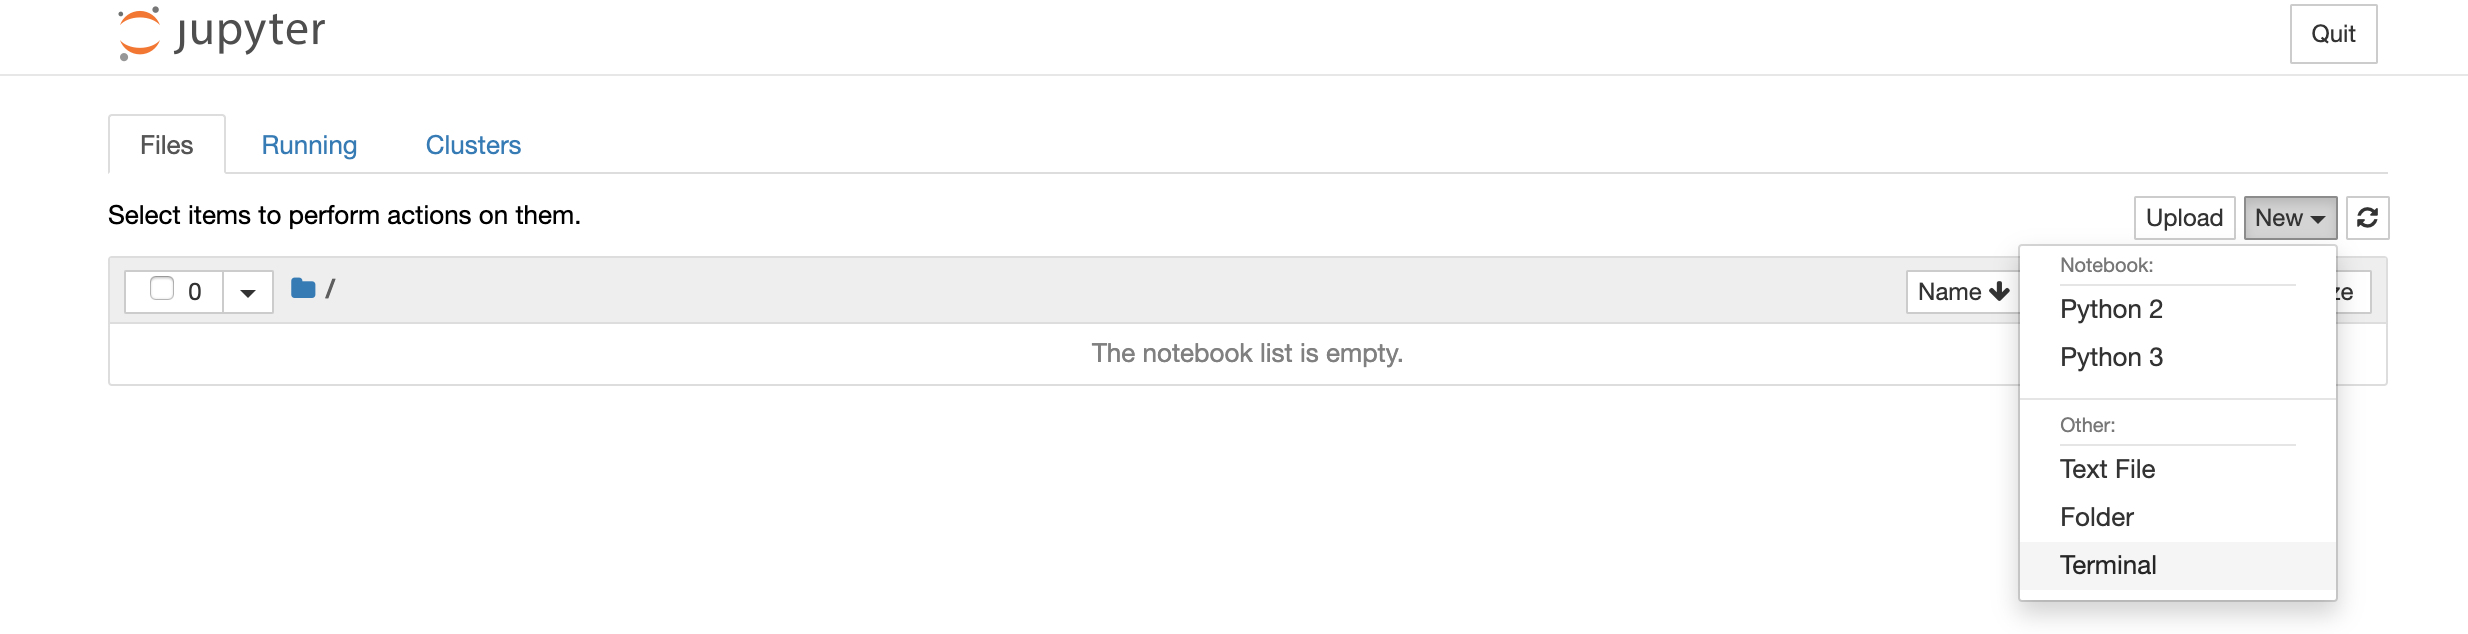
-
Run the following command to clone the Kubeflow Fairing project:
git clone https://github.com/kubeflow/fairing.gitThis command clones the project including the example into your notebook server.
You can now close the terminal window, and you should now see the fairing folder
in your notebooks server’s Files tab. Navigate to the example notebooks at
fairing/examples/prediction/xgboost-high-level-apis.ipynb.
Executing the notebook
Before running the cells, read the following to learn how to configure Fairing to use your Azure resources.
In the xgboost-high-level-apis.ipynb notebook, find the cell tagged with
parameters and update this cell to use Azure. Update following values to
configure Fairing to use your Azure backend and Storage.
export FAIRING_BACKEND = 'KubeflowAzureBackend'
export DOCKER_REGISTRY = '<acr-name>.azurecr.io'
export AZURE_REGION = None # This is only relevant if you haven't created a
                           # Storage yet and let Fairing create it for you.
                           # In that case, you can specify the region as
                           # string, for example, 'NorthEurope'.
export AZURE_RESOURCE_GROUP = '<storage-resource-group>'
export AZURE_STORAGE_ACCOUNT = '<storage-name>'
After the above steps have been completed, you can run the example notebook.
You can also have a look at the CI pipeline that runs the example notebook in AKS for steps involved to accomplish a successful run programmatically.
Feedback
Was this page helpful?
Glad to hear it! Please tell us how we can improve.
Sorry to hear that. Please tell us how we can improve.